
Clean Eating Apple Crisp is a comforting dessert that brings together tender cinnamon-spiced apples and a golden, crumbly oat topping. Made with simple ingredients like fresh apples, rolled oats, almond flour, honey or maple syrup, and coconut oil, this homemade crisp offers a delicious way to enjoy classic apple dessert flavors with a more wholesome ingredient list.
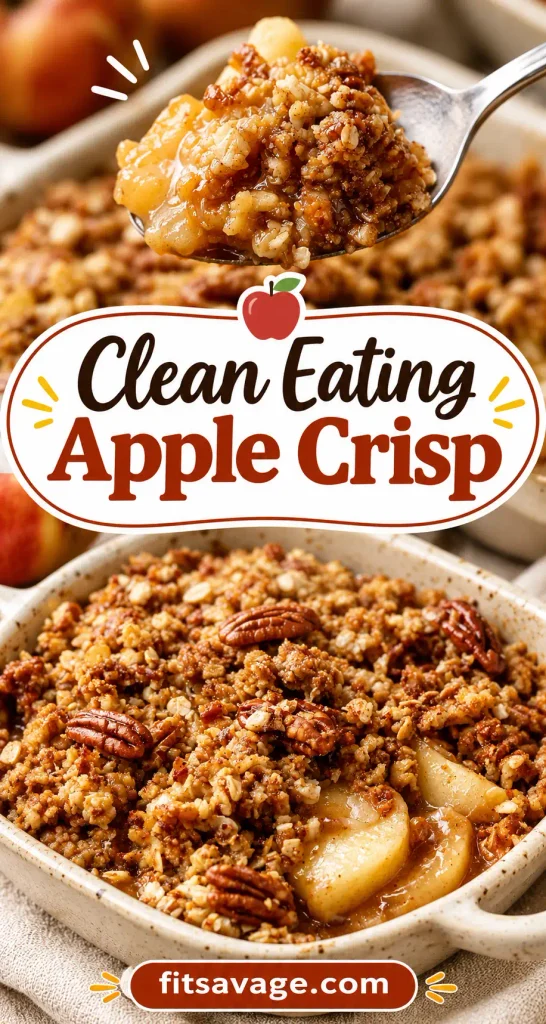
As the apples soften, they release their natural juices and blend with the cinnamon and a touch of lemon juice, creating a warm, fragrant filling. The oat topping adds a satisfying contrast, turning lightly crisp and golden as it bakes. Serve it warm for a cozy dessert, enjoy it as a weekend breakfast treat, or pair it with yogurt for a simple snack.
Why You’ll Love This Recipe
- Simple, wholesome ingredients: Fresh apples, oats, flour, natural sweetener, and a few pantry staples come together without complicated ingredients.
- Naturally sweet apple filling: Honey or maple syrup enhances the apples without overpowering their flavor.
- Warm cinnamon flavor: Cinnamon gives the filling that familiar apple crisp aroma and cozy taste.
- Easy to customize: Choose almond flour or whole wheat flour, and use coconut oil or butter based on your preference.
- Perfect for make-ahead prep: The apples can be sliced and the topping mixed ahead of time, making assembly easy when you’re ready to bake.
- Deliciously versatile: Enjoy it on its own or with Greek yogurt, a little milk, or your favorite dessert topping.
Preparation and Tools
This apple crisp requires only a few basic kitchen tools.
- Baking dish: Use a medium baking dish that comfortably holds the apple filling and topping in an even layer.
- Mixing bowls: One bowl for the apples and another for the oat topping makes preparation simple.
- Apple peeler and knife: Peel the apples if desired, then slice them evenly so they soften at a similar rate.
- Measuring cups and spoons: Accurate measurements help maintain the balance between the juicy filling and crisp topping.
- Spoon or spatula: Useful for tossing the apples and distributing the topping.
Before you begin, wash and slice the apples, measure the ingredients, and melt the coconut oil or butter. Having everything ready makes assembling the crisp quick and straightforward.
Preparation Tips
Choose apples that hold their shape. Firm apples are ideal because they soften during baking without immediately turning into applesauce. A combination of sweet and tart varieties can create a balanced flavor.
Slice the apples evenly. Aim for slices of similar thickness so they cook consistently. Very thick slices may remain firm, while extremely thin slices can become overly soft.
Taste your apples before adding sweetener. If they’re naturally sweet, you may prefer a lighter touch of honey or maple syrup. Tart apples may benefit from the full amount.
Use the right flour for your preference. Almond flour gives the topping a tender, nutty quality, while whole wheat flour creates a more traditional crumbly texture.
Melt the coconut oil or butter gently. The fat should be melted but not excessively hot when mixed with the oats and flour.
Keep the topping crumbly. Stir until the ingredients are evenly moistened. Avoid mixing it into a smooth paste; small clusters help create a crisp, textured topping.
Ingredients
For the Apple Filling
Apples: Five cups of sliced apples, approximately four medium apples, form the base of the dessert. Their natural sweetness and juices create a soft, flavorful filling.
Honey or maple syrup: Two tablespoons add sweetness while allowing the apple flavor to remain the focus. Maple syrup provides a deeper, slightly caramel-like taste, while honey offers a gentle floral sweetness.
Lemon juice: One teaspoon brightens the filling and balances the sweetness of the apples.
Ground cinnamon: One teaspoon adds warmth and classic apple crisp flavor.
For the Oat Topping
Old-fashioned rolled oats: Three-quarters cup provides the hearty texture and familiar oat flavor that make the topping satisfying.
Almond flour or whole wheat flour: Half a cup helps bind the topping ingredients and creates a crumbly texture. Almond flour adds a subtle nutty flavor, while whole wheat flour offers a more rustic finish.
Honey or maple syrup: Two tablespoons sweeten the topping and help the oat mixture form small clusters.
Melted coconut oil or butter: Three tablespoons add richness and help the topping become golden and crisp.
Salt: A pinch balances the sweetness and brings out the flavors of the apples, cinnamon, and oats.
Cooking Instructions
Step 1: Prepare the Apples
Slice the apples into even pieces and place them in a mixing bowl. Add the honey or maple syrup, lemon juice, and ground cinnamon.
Toss everything together until the apple slices are evenly coated. The cinnamon should be distributed throughout the fruit, and the apples should have a light glossy coating from the sweetener and lemon juice.
Transfer the apple mixture into your baking dish, spreading it into an even layer.
Step 2: Make the Oat Crisp Topping
In a separate bowl, combine the old-fashioned rolled oats, almond flour or whole wheat flour, and a pinch of salt.
Add the honey or maple syrup along with the melted coconut oil or butter. Stir until the dry ingredients are moistened and the mixture begins to form small crumbs.
The topping should look slightly clumpy rather than wet or smooth. If needed, use your fingers to gently break up larger pieces and distribute the mixture evenly.
Step 3: Assemble the Crisp
Sprinkle the oat topping over the apples, covering the fruit as evenly as possible.
Leave some small gaps if you prefer a little of the apple filling to peek through. Avoid pressing the topping firmly into the fruit, as a loose layer allows it to bake into a more pleasant crumbly texture.
Step 4: Bake Until Tender and Golden
Bake the apple crisp in a preheated oven at 350°F (175°C) until the apples are tender and the topping is golden brown, approximately 35–45 minutes.
The exact baking time can vary depending on the apple variety, slice thickness, and baking dish. Look for bubbling juices around the edges and a topping that feels lightly crisp.
To check the apples, carefully insert a knife into the filling. It should slide through the slices with little resistance.
If the topping becomes golden before the apples are tender, loosely cover the dish with foil and continue baking until the fruit softens.
Step 5: Let It Rest and Serve
Remove the apple crisp from the oven and allow it to rest for about 10–15 minutes before serving.
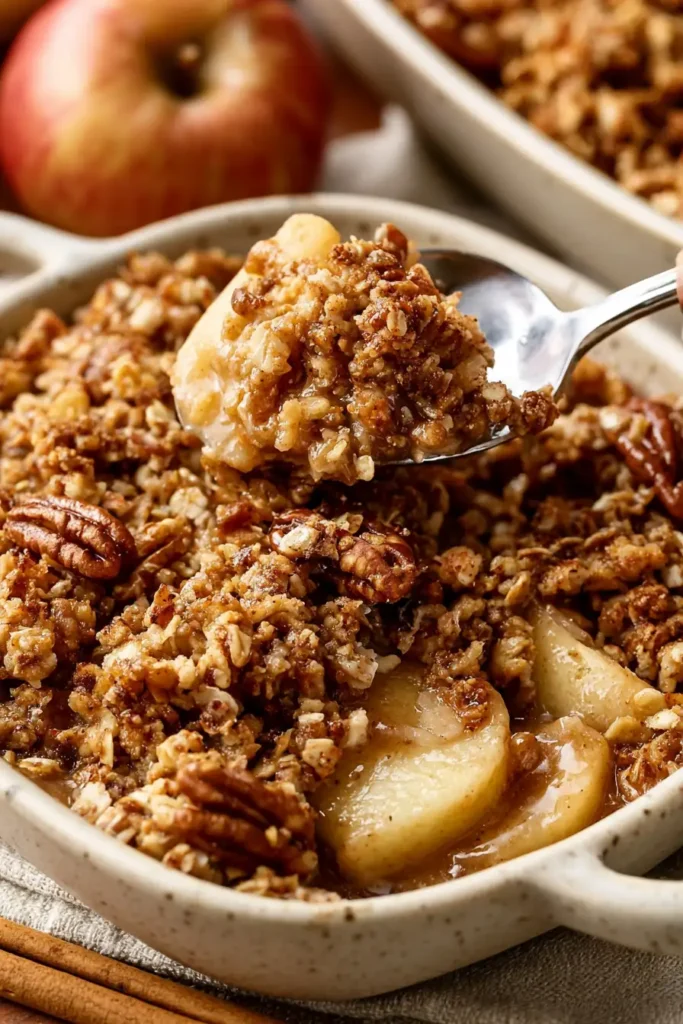
This short resting period allows the juices to settle and the filling to thicken slightly. Serve warm, spooning portions of the soft cinnamon apples and crunchy oat topping into bowls.
Notes
- Apple varieties: Granny Smith, Honeycrisp, Pink Lady, and Fuji are good options. Mixing tart and sweet apples creates a more layered flavor.
- Flour choice: Almond flour is a good option for a nutty topping, while whole wheat flour gives it a more traditional crisp texture.
- Sweetener choice: Honey and maple syrup can be used interchangeably in the filling and topping.
- Texture preference: For a softer topping, keep it in a more even layer. For extra texture, leave some larger oat clusters.
- Make-ahead preparation: Mix the apple filling and topping separately, then assemble shortly before baking for the best topping texture.
Common Mistakes to Avoid
Cutting the apples unevenly: Different-sized slices cook at different rates. Keep them similar in thickness for a consistently tender filling.
Using too much sweetener: Apples already contain natural sweetness. Adding more than the recipe calls for can make the filling overly sweet and watery.
Making the topping too wet: Adding too much melted fat or sweetener can create a dense topping instead of a crumbly one. Measure carefully and mix just until combined.
Packing down the topping: Pressing it firmly over the apples can prevent the crumbs from becoming light and crisp. Sprinkle it loosely over the fruit.
Removing the crisp too early: A golden topping doesn’t always mean the apples are tender. Check the fruit with a knife and allow additional baking time if needed.
Serving immediately from the oven: The filling will be very hot and loose when first baked. Letting it rest briefly improves its texture and makes serving easier.
What to Serve With Clean Eating Apple Crisp
- Plain Greek yogurt: Its creamy texture and tangy flavor complement the warm cinnamon apples.
- Vanilla yogurt: Adds a sweet, creamy contrast to the fruit and oat topping.
- A splash of milk: A simple option for enjoying the crisp as a breakfast-style treat.
- Vanilla ice cream: A classic dessert pairing for those who want a more indulgent serving.
- Chopped nuts: A sprinkle of walnuts or pecans adds extra crunch and a nutty flavor.
Storage Instructions
Allow leftover apple crisp to cool before storing it in an airtight container.
Refrigerator: Store for up to 4 days. The topping will soften as it absorbs moisture from the apples.
Freezer: Freeze in a freezer-safe container for up to 2–3 months. For convenience, freeze individual portions. Thaw overnight in the refrigerator before reheating.
Reheating: Warm individual servings in the microwave until heated through. For a crispier topping, reheat in the oven at 350°F (175°C) until warm.
Make-ahead: Prepare the apple filling and topping separately and refrigerate them for up to a day. Assemble just before baking. You can also bake the crisp ahead of time and reheat it before serving.
Estimated Nutrition
Estimated per serving, assuming 6 servings:
- Calories: Approximately 250
- Carbohydrates: 37 g
- Protein: 3 g
- Fat: 11 g
- Fiber: 5 g
Nutrition values are estimates and will vary depending on the apple variety, flour choice, sweetener, and whether coconut oil or butter is used.
Frequently Asked Questions
Do I need to peel the apples?
No. You can leave the skins on for extra texture and convenience. If you prefer a softer, more traditional filling, peel the apples before slicing.
Can I use quick oats instead of rolled oats?
Old-fashioned rolled oats are recommended because they provide a heartier texture. Quick oats may create a softer, less distinct topping.
Can I make this apple crisp without almond flour?
Yes. Use whole wheat flour in the same quantity. The topping will have a slightly different texture and flavor but will still work well.
Why is my apple crisp watery?
Some apple varieties release more juice than others. Slicing the apples evenly, measuring the sweetener carefully, and allowing the crisp to rest after baking can help the filling settle.
Can I prepare apple crisp ahead of time?
Yes. You can prepare the filling and topping separately and store them in the refrigerator. Assemble and bake when ready for the best texture.
How do I know when the apple crisp is done?
The topping should be golden, the filling should bubble around the edges, and a knife should slide easily into the apple slices.
Conclusion
Clean Eating Apple Crisp is a simple way to enjoy the comforting flavors of baked apples, cinnamon, and a golden oat topping. With easy-to-find ingredients and straightforward preparation, it’s a lovely dessert to share or enjoy throughout the week. Serve it warm with yogurt or your favorite topping for a cozy, satisfying treat.
Print
Clean Eating Apple Crisp
- Total Time: 50–60 minutes
- Yield: 6 servings 1x
- Diet: Vegetarian
Description
This Clean Eating Apple Crisp features tender cinnamon-spiced apples topped with a golden, crumbly mixture of rolled oats, almond flour, and natural sweetener. An easy homemade dessert made with simple ingredients and delicious warm apple flavor.
Ingredients
Apple Filling
- 5 cups sliced apples (about 4 medium apples)
- 2 tablespoons honey or maple syrup
- 1 teaspoon lemon juice
- 1 teaspoon ground cinnamon
Oat Topping
- ¾ cup old-fashioned rolled oats
- ½ cup almond flour or whole wheat flour
- 2 tablespoons honey or maple syrup
- 3 tablespoons melted coconut oil or butter
- Pinch of salt
Instructions
- Preheat the oven to 350°F (175°C).
- Place the sliced apples in a mixing bowl. Add 2 tablespoons of honey or maple syrup, lemon juice, and cinnamon. Toss until evenly coated.
- Transfer the apple mixture to a baking dish and spread it into an even layer.
- In a separate bowl, combine the rolled oats, almond flour or whole wheat flour, and salt.
- Add the remaining 2 tablespoons of honey or maple syrup and the melted coconut oil or butter. Stir until the mixture forms moist, crumbly clusters.
- Sprinkle the oat topping evenly over the apples without pressing it down.
- Bake for 35–45 minutes, until the topping is golden, the apple filling is bubbling, and the apples are tender when pierced with a knife.
- Remove from the oven and let rest for 10–15 minutes before serving.
Notes
- Use firm apples such as Granny Smith, Honeycrisp, or Fuji for a tender filling that holds its shape.
- Almond flour creates a nutty topping, while whole wheat flour gives a more traditional crumbly texture.
- Store leftovers in an airtight container in the refrigerator for up to 4 days.
- Prep Time: 15 minutes
- Cook Time: 35–45 minutes
- Category: Recipes
- Method: Baked
- Cuisine: American
Nutrition
- Serving Size: 1/6
- Calories: 250 kcal
- Sugar: 22 g
- Sodium: 55 mg
- Fat: 11 g
- Saturated Fat: 6 g
- Unsaturated Fat: 4 g
- Trans Fat: 0 g
- Carbohydrates: 37 g
- Fiber: 5 g
- Protein: 3 g
- Cholesterol: 0 mg
Keywords: Clean Eating Apple Crisp, healthy apple crisp, cinnamon apple crisp, oat apple crumble, homemade apple dessert
Leave a Comment