
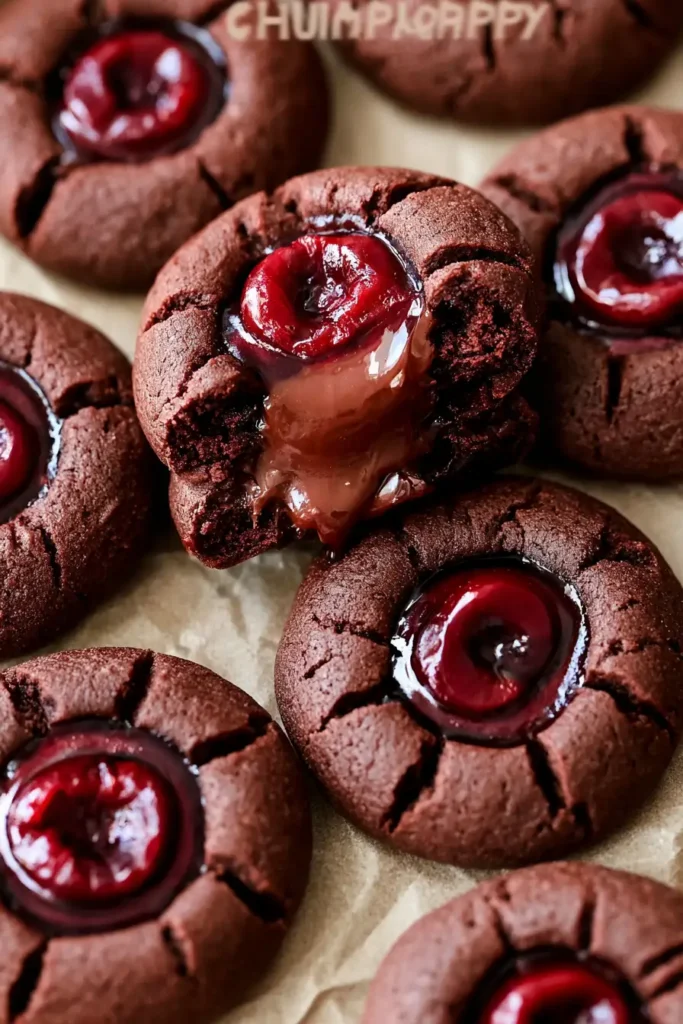
Chocolate Cherry Thumbprint Cookies combine rich, buttery chocolate cookies with a sweet cherry center and a smooth chocolate coating. Each cookie has a tender, slightly crumbly texture, a deep cocoa flavor, and a bright cherry filling that makes every bite taste like a little chocolate-covered cherry.

These cookies are a lovely choice for Christmas cookie trays, Valentine’s Day treats, holiday gatherings, or whenever you’re craving something a little more special than an ordinary chocolate cookie. They’re made with simple baking ingredients, and the combination of chocolate and cherries gives them an elegant look without requiring complicated decorating.
Why You’ll Love This Recipe
- Rich chocolate flavor: Unsweetened cocoa powder gives the cookies a delicious chocolate base without making them overly sweet.
- Sweet cherry centers: Cherry pie filling adds a fruity contrast to the buttery chocolate dough.
- Beautiful presentation: The thumbprint centers and chocolate coating make these cookies look bakery-worthy.
- Perfect for special occasions: Their chocolate-and-cherry combination makes them especially suitable for holiday dessert tables and homemade edible gifts.
- Easy to customize: You can use semi-sweet or dark chocolate and choose cherry pie filling or maraschino cherries for the centers.
Preparation and Tools
Before starting, allow the unsalted butter to soften at room temperature. Softened butter is easier to cream with sugar and helps create a smooth, evenly mixed cookie dough.
You’ll need a large mixing bowl, an electric hand mixer or stand mixer, measuring cups and spoons, a rubber spatula, a baking sheet, and parchment paper. A small spoon or your thumb will help create the centers, while a microwave-safe bowl or heatproof bowl will be useful for melting the chocolate coating.
Prepare the cherry filling before shaping the cookies. If you’re using maraschino cherries instead of cherry pie filling, drain them thoroughly and pat them dry with paper towels to remove excess moisture.
Preparation Tips
Use properly softened butter. The butter should give slightly when pressed but should not look melted or greasy. Butter that’s too warm can make the dough overly soft and affect how well the cookies hold their shape.
Measure the flour carefully. Too much flour can make the cookies dry and crumbly. For the most consistent results, weigh the flour when possible.
Avoid overmixing the dough. Once the flour and cocoa powder are incorporated, stop mixing. Overworking the dough can make the cookies less tender.
Keep the cherry filling controlled. Too much filling can overflow from the thumbprint centers. Add enough to fill each indentation without creating a large mound.
Choose your chocolate according to taste. Semi-sweet chocolate creates a balanced coating, while dark chocolate gives the cookies a deeper, less sweet finish.
Ingredients for Chocolate Cherry Thumbprint Cookies
Chocolate Cookie Dough
- Unsalted butter: Forms the rich, tender base of the cookies. Softened butter also makes creaming with sugar easier.
- Granulated sugar: Sweetens the dough and contributes to its delicate cookie texture.
- Egg yolk: Adds richness and helps bind the ingredients without adding the extra moisture of a whole egg.
- Vanilla extract: Enhances the chocolate flavor with a subtle sweetness.
- All-purpose flour: Provides the structure needed to keep the cookies together.
- Unsweetened cocoa powder: Gives the dough its deep chocolate color and flavor.
- Salt: Balances the sweetness and brings out the cocoa flavor.
Chocolate Coating
- Semi-sweet or dark chocolate: Creates a smooth chocolate coating that complements the cherry filling.
- Coconut oil or vegetable shortening: Helps loosen the melted chocolate, making it smoother and easier to work with.
Cherry Filling
- Cherry pie filling: Provides a sweet, fruity center with a soft texture.
- Maraschino cherries: An alternative for a more defined cherry center. Drain and pat them dry before using.
How to Make Chocolate Cherry Thumbprint Cookies
Step 1: Prepare the Chocolate Cookie Dough
Place the softened unsalted butter and granulated sugar in a large mixing bowl. Beat with an electric mixer until the mixture looks smooth, creamy, and well combined.
Add the egg yolk and vanilla extract. Continue mixing until everything is incorporated and the mixture looks evenly blended.
In a separate bowl, combine the all-purpose flour, unsweetened cocoa powder, and salt. Whisk the dry ingredients together to distribute the cocoa and salt evenly.
Gradually add the dry mixture to the butter mixture, mixing on low speed until a soft chocolate dough forms. Scrape down the sides of the bowl with a rubber spatula as needed.
Step 2: Shape the Cookies and Create the Thumbprints
Divide the dough into evenly sized portions and roll each portion between your palms to form smooth balls.
Arrange the dough balls on a baking sheet lined with parchment paper, leaving enough space between them.
Using your thumb or the back of a small spoon, gently press into the center of each dough ball to create an indentation.
Press carefully rather than flattening the entire cookie. The goal is to create a small well deep enough to hold the cherry filling while keeping the surrounding cookie dough intact.
Step 3: Bake the Cookies
Place the prepared cookies in the oven and bake until the edges are set and the centers look slightly firm.
The cookies should retain their round shape, with the thumbprint indentations still visible. Avoid waiting until they look completely firm throughout, as chocolate cookies can become dry if overbaked.
Once baked, allow the cookies to cool on the baking sheet briefly before transferring them to a wire rack to cool completely.
Step 4: Prepare the Cherry Filling
While the cookies cool, prepare the cherry filling.
If using cherry pie filling, stir it gently to distribute the cherries and syrup. If the cherries are particularly large, make sure the pieces will fit comfortably inside the cookie centers.
For the maraschino cherry option, drain the cherries thoroughly and pat them dry with paper towels.
Once the cookies have cooled, spoon a small amount of cherry filling into each indentation. Keep the filling within the center so it doesn’t spill over the cookie edges.
Step 5: Melt the Chocolate Coating
Finely chop the semi-sweet or dark chocolate and place it in a microwave-safe bowl.
Add the coconut oil or vegetable shortening. Melt the mixture gently, stirring between intervals until the chocolate becomes smooth and glossy.
Avoid overheating the chocolate. Stop heating once most of the pieces have melted and stir until the remaining chocolate dissolves.
Allow the melted chocolate to cool slightly if it seems too hot or thin before using it to coat the cookies.
Step 6: Coat the Cookies with Chocolate
Carefully dip or spoon the melted chocolate over the cookies, following the intended coating while keeping the cherry centers visible.
Allow any excess chocolate to drip away before placing the cookies back on the parchment-lined baking sheet.
Let the chocolate coating set before serving. Once firm, the cookies will have a rich chocolate exterior, a tender cocoa cookie base, and a sweet cherry center.
What to Serve With Chocolate Cherry Thumbprint Cookies
Chocolate Cherry Thumbprint Cookies are delicious on their own, but they also pair beautifully with warm drinks and other simple desserts.
Here are a few serving ideas:
- Hot chocolate: A mug of creamy hot chocolate makes a wonderful pairing with the rich cocoa cookies and sweet cherry centers.
- Coffee or espresso: The slightly bitter flavor of coffee balances the sweetness of the cherry filling and chocolate coating.
- Vanilla ice cream: Serve a couple of cookies alongside a scoop of vanilla ice cream for an easy dessert.
- Fresh berries: Strawberries or raspberries add a fresh, slightly tart contrast to the chocolate.
- Milk: A cold glass of milk is a classic choice, especially when serving these cookies to children.
For holiday gatherings, arrange the cookies on a dessert platter with other chocolate treats, shortbread cookies, and festive baked goods.
Storage Instructions
At room temperature: Once the chocolate coating has completely set, place the cookies in an airtight container. Store them in a cool, dry place for up to 2 days, provided the cherry filling and room conditions are suitable.
In the refrigerator: Because cherry pie filling can contain additional moisture, refrigeration is the better option for longer storage. Keep the cookies in an airtight container in the refrigerator for approximately 4–5 days.
Freezing: For the best texture, freeze the unfilled chocolate cookies before adding the cherry filling and chocolate coating. Arrange the cooled cookies in a single layer until firm, then transfer them to a freezer-safe container with parchment paper between layers. Freeze for up to 2 months for best quality.
Thaw the cookies in the refrigerator before adding the cherry filling and chocolate coating.
Make-ahead preparation: You can prepare the cookie dough ahead of time and refrigerate it in a covered container. Allow it to soften enough to shape comfortably before forming the cookie balls and thumbprint indentations.
Estimated Nutrition
The following nutrition information is an estimate based on the listed ingredients and an assumed yield of approximately 20 cookies.
Estimated nutrition per cookie
220
Calories
16 g
Fat
21 g
Carbohydrates
2 g
Protein
Approximate values only. Actual nutrition will vary depending on the chocolate used, cherry filling, coating amount, and final cookie yield.
Frequently Asked Questions
Can I use maraschino cherries instead of cherry pie filling?
Yes! Maraschino cherries are a convenient alternative. Drain them thoroughly and pat them dry with paper towels before placing them in the cookie centers. This helps prevent excess moisture from affecting the cookies.
Why are my thumbprint cookies cracking?
Small cracks can occur when shaping chocolate cookie dough, especially if the dough is a little dry or too cold. Roll the dough gently between your palms and press the centers carefully. If cracks appear, smooth the edges with your fingers before baking.
Can I use milk chocolate for the coating?
Yes, although the supplied recipe calls for semi-sweet or dark chocolate. Milk chocolate can be used if you prefer a sweeter coating. Keep in mind that it will make the finished cookies noticeably sweeter.
Do I need to refrigerate Chocolate Cherry Thumbprint Cookies?
Refrigeration is recommended for longer storage because of the cherry filling. Keep the cookies in an airtight container to protect their texture and prevent them from absorbing refrigerator odors.
Can I make the cookie dough ahead of time?
Yes. Prepare the dough in advance and keep it covered in the refrigerator. When you’re ready to bake, allow it to soften enough to roll into balls and create the thumbprint centers.
How do I keep the chocolate coating smooth?
Finely chop the chocolate before melting it and add the coconut oil or vegetable shortening. Melt gently and stir frequently. Avoid introducing water into the melted chocolate, as even a small amount can cause it to seize.
Final Thoughts
Chocolate Cherry Thumbprint Cookies bring together two classic dessert flavors in one beautiful little treat. The buttery cocoa cookies, sweet cherry centers, and smooth chocolate coating make them a lovely addition to holiday celebrations, cookie exchanges, or everyday dessert plates.
Prepare a batch ahead of your next gathering and enjoy the combination of rich chocolate and fruity cherry in every bite.
Print
Chocolate Cherry Thumbprint Cookies
- Total Time: 50 minutes
- Yield: 20 cookies 1x
- Diet: Vegetarian
Description
Chocolate Cherry Thumbprint Cookies are buttery cocoa cookies filled with sweet cherry filling and finished with a smooth chocolate coating. These beautiful homemade cookies are perfect for Christmas baking, Valentine’s Day, cookie exchanges, and chocolate lovers.
Ingredients
For the Chocolate Cookie Dough:
- 1 cup (226g) unsalted butter, softened
- ¾ cup (150g) granulated sugar
- 1 large egg yolk
- 1 teaspoon vanilla extract
- 1 ¼ cups (160g) all-purpose flour
- ½ cup (40g) unsweetened cocoa powder
- ¼ teaspoon salt
For the Chocolate Coating:
- 8 oz (225g) semi-sweet or dark chocolate, finely chopped
- 1 teaspoon coconut oil or vegetable shortening
For the Cherry Filling:
- 1 cup cherry pie filling (or about 20 maraschino cherries, drained and patted dry)
Instructions
- Cream the softened butter and granulated sugar in a large mixing bowl until smooth and creamy.
- Add the egg yolk and vanilla extract. Mix until fully incorporated.
- In a separate bowl, whisk together the flour, cocoa powder, and salt.
- Gradually add the dry ingredients to the butter mixture, mixing on low speed until a soft chocolate dough forms.
- Roll the dough into evenly sized balls and arrange them on a parchment-lined baking sheet, leaving space between each cookie.
- Gently press your thumb or the back of a small spoon into the center of each dough ball to create an indentation.
- Bake in the preheated oven until the edges are set and the centers look slightly firm. Allow the cookies to cool briefly on the baking sheet before transferring them to a wire rack to cool completely.
- Prepare the cherry filling. If using maraschino cherries, drain them thoroughly and pat them dry with paper towels.
- Spoon a small amount of cherry filling into each cooled cookie indentation without overfilling.
- Place the finely chopped chocolate and coconut oil or vegetable shortening in a microwave-safe bowl. Melt gently, stirring between intervals until smooth and glossy.
- Carefully dip or spoon the melted chocolate over the cookies while keeping the cherry centers visible.
- Return the cookies to the parchment-lined baking sheet and allow the chocolate coating to set before serving.
Notes
- Use softened, not melted, butter to create a smooth cookie dough.
- Drain and pat maraschino cherries dry before using to prevent excess moisture.
- Melt the chocolate gently and stir frequently to achieve a smooth coating.
- Prep Time: 20 minutes
- Cook Time: 12–15 minutes
- Category: Recipes
- Method: Baked
- Cuisine: American
Nutrition
- Serving Size: 1 cookie
- Calories: 220 kcal
- Sugar: 13 g
- Sodium: 75 mg
- Fat: 14 g
- Saturated Fat: 9 g
- Unsaturated Fat: 4 g
- Trans Fat: 0.5 g
- Carbohydrates: 23 g
- Fiber: 2 g
- Protein: 3 g
- Cholesterol: 40 mg
Keywords: Chocolate Cherry Thumbprint Cookies, chocolate thumbprint cookies, cherry chocolate cookies, holiday cookies, chocolate cherry desserts
Leave a Comment